Metrology solutions for aerospace industry: A ZEISS Industrial Metrology case study
By OEM Update Editorial April 12, 2022 2:19 pm IST
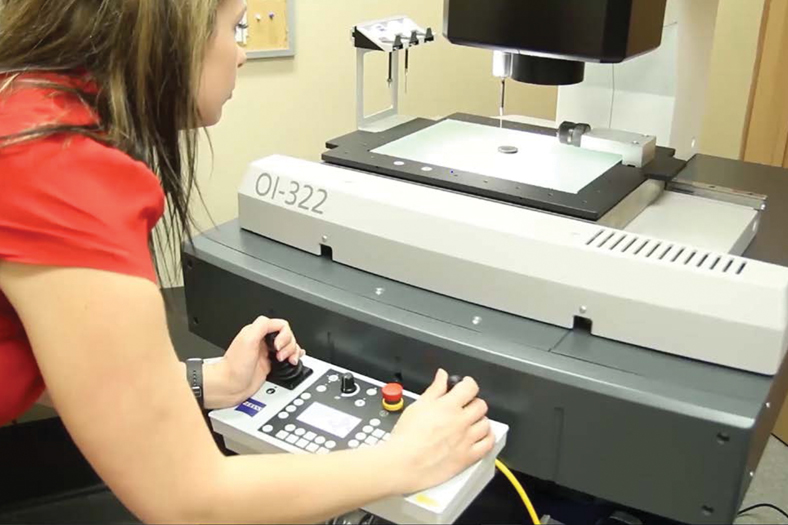
The CMM, especially O-INSPECT 322, is very helpful in letting us know what our process capabilities are on the components that we are building.
Amphenol Canada Corp.
Amphenol Canada is a manufacturing facility for interconnect products. We manufacture for the military and aerospace industries, as well as some communications and satellite parts. We are a complete manufacturing facility for our connectors. We manufacture the contacts as well as the rubber inserts, as well as the plastic inserts, and the shells, so we are making almost all the components for our connectors in house. We have three ZEISS products on site. We have two ZEISS CMMs, the DuraMax and the O-INSPECT, as well as the ZEISS Microscope. The O-INSPECT 322 offers us the advantage of having both tactile and optical measurements. We have some components that have several different diameters within one hole. One diameter will be a hole with an undercut in it that requires a probe and another diameter will be too small for that same probe to measure. The O-INSPECT can gather the concentricity of the diameters within that hole, because it’s able to measure with both tactile and optical measurements.
Our production process starts in engineering. Our engineers will create new designs for our customers, and this is happening on a daily basis. Once the design is complete, we start the components into production. The CMM, especially the O-INSPECT 322, is very helpful in letting us know what our process capabilities are on the components that we are building, so we can ensure the first time we build a part we build it correctly. The CALYPSO software is very user friendly, and a great tool to use when we are programming. It has an easy-to-use CAD interface, and if you don’t have access to a CAD, you can simply walk up to the machine and start to take measurements. I find that having people trained to use the CMM is quite easy because if they are familiar with Windows, they are already familiar with a lot of the functions in CALYPSO.The advantage to having ZEISS equipment isn’t just about having the best CMMs on the market. It’s also about having the best support. If I have a question about programming, a question about software, or even about the machine itself, the people on the hotline are ready and willing to help. Our local dealer has also been with me every step of the way. Anything I have needed, they have been there for me. Having the ZEISS O-INSPECT has allowed me to see my parts in a whole new way.
For more information: www.zeiss.com/metrology
Cookie Consent
We use cookies to personalize your experience. By continuing to visit this website you agree to our Terms & Conditions, Privacy Policy and Cookie Policy.


